Here is a link to a very cute tutorial for making the most wonderful mixed media snowy owl ornaments. I know that I will be making these in the very near future and you can be sure that they will look super cute on my white wintery tree.
that artist woman: Snowy Owl Ornaments
I love everything about the details on this little bird. I am pretty sure I will be able to locate all the supplies for this treasure. I even have a bag of the black and white guinea hen feathers on hand. Don't you just love the page of text from an old library book used as the center body with the gold sequins catching the light?
I may not even wait until next year. This particular ornament may even become real for this Christmas. Thank you kindly, Gail aka That Artist Woman!
Showing posts with label Christmas ornament. Show all posts
Thursday, December 23, 2010
Thursday, December 16, 2010
Snowman Angel Ornament
I trimmed off the hats, because we were planning to create a halo effect above the head with a button attached by a twisted wire.
The next step was to paint the top with a dark acrylic paint. We tried them in coffee brown, teal blue, violet, black, and forest green. Once that was dry, we brushed on the clear gel medium that would produce a crackle effect. Finally, when the crackle medium had dried, it was time to over paint with the white acrylic and then the crackle effect happened. I think the trick to using that successfully is to apply it quite heavily. We had such a variety of crackle effects. Some of the crazing was minimal and you could hardly notice it and others got a nice deep crackle effect. I think if the medium was spread too thinly, it wasn't as effective.
Then we used a variety of buttons to decorate the snowmen's fronts. A large white button was threaded with white wire and twisted tightly to hold the button above the head as a halo. A bit of Tacky Glue (PVC) anchored it into the small hole we poked in the top of the head.
The faces were drawn with orange paint pens and black sharpie markers.
Lastly, the stick arms, wings, and the string hangers were glued to the back. We sandwiched them all and hid the hot glue under the wings on the back of the ornament.
| SnowAngel Ornament made with AccuCut |
![]() |
| I trimmed off the edges of the foam tray before sending it thru the Accu Cut machine. |
![]() |
| They popped out very easily. |
![]() |
| Snowman Line Up |
![]() |
| Cemter one has the hat trimmed off. |
The next step was to paint the top with a dark acrylic paint. We tried them in coffee brown, teal blue, violet, black, and forest green. Once that was dry, we brushed on the clear gel medium that would produce a crackle effect. Finally, when the crackle medium had dried, it was time to over paint with the white acrylic and then the crackle effect happened. I think the trick to using that successfully is to apply it quite heavily. We had such a variety of crackle effects. Some of the crazing was minimal and you could hardly notice it and others got a nice deep crackle effect. I think if the medium was spread too thinly, it wasn't as effective.
Then we used a variety of buttons to decorate the snowmen's fronts. A large white button was threaded with white wire and twisted tightly to hold the button above the head as a halo. A bit of Tacky Glue (PVC) anchored it into the small hole we poked in the top of the head.
The faces were drawn with orange paint pens and black sharpie markers.
Lastly, the stick arms, wings, and the string hangers were glued to the back. We sandwiched them all and hid the hot glue under the wings on the back of the ornament.
Monday, July 26, 2010
Sneak Peek of Ornament
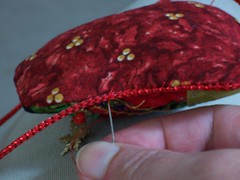
My Christmas in July ornament is on it's way to where it needs to go! I am very pleased with how it has turned out. I will share more photos of it later but I'll wait to find out that the recipient gets it first.
I had it in the works since just after July 4th, but did all the finishing touches on it this last weekend. I noticed so many stores having Christmas in July promotions and was much more aware of all the crafty supplies and fabrics at my fabric store when I went to pick up the cording. I am in the mood and motivated to make a couple more ornaments before I put away my supplies.
I also became aware of a very cute blog site written specifically about Christmas all year round! I'd like to share it with you with this link: Terri loves Christmas and has frequent posts about Christmas topics frequently on her blog called Christmas Tree Lane.
I had it in the works since just after July 4th, but did all the finishing touches on it this last weekend. I noticed so many stores having Christmas in July promotions and was much more aware of all the crafty supplies and fabrics at my fabric store when I went to pick up the cording. I am in the mood and motivated to make a couple more ornaments before I put away my supplies.
I also became aware of a very cute blog site written specifically about Christmas all year round! I'd like to share it with you with this link: Terri loves Christmas and has frequent posts about Christmas topics frequently on her blog called Christmas Tree Lane.
Wednesday, June 30, 2010

My blogging friend Terri of Terri's Notebook has decided to run a swap in the month of July. In her recent post she has described many fun ways of crafting some wonderful ornaments. I have signed up and am looking forward to making an ornament for a partner. We will mail them off by the end of July. If you're thinking of doing this swap, please check Terri's blog for the details. She was hoping to take signups only until July 4th, so time is ticking away quickly.
Monday, November 30, 2009
Clues About 4 Seasons Christmas Quilt Swap
I'm excited to hear when my 4 seasons swap partner receives her Christmas quilt package! I sent it off earlier in today's mail. Hopefully it doesn't take long for it to arrive at her doorstep. I think she may live somewhere very near Chicago.
It turned out that I made her goodies all fit inside a Christmas stocking.
When I wrapped the package I tied on a handmade crazy quilt ornament to finish off the gift.
Perhaps I could give just a clue, but I have disguised the look by giving the photo a sepia tone.
When I hear that she has actually opened her box, I will definitely post more photos.Sunday, September 6, 2009
Inchies Christmas Ornament
I have been practicing the ornament idea
that I saw posted with quilting bloggers. It showed up on my facebook this week and it looked like fun. I believe they will be having an ornaments swap this fall and I wanted to see what it was like to put one together before I sign up. It was a lot of fun and not too fussy, so I'll probably sign on. The tutorial by Nadine Ruggles explains it all very nicely. You can go there to see this version where the tiny little quilt squares get sandwiched between a ribbon or you can explore a little more and find out how to string them together with a beaded hanger. They are both very lovely. Below is a link to click on and it will take you to the tutorial by Nadine. http://inchiequilts.com/2009/09/04/inchie-ornaments-the-super-secret-project-revealed/
Anyway it gave me a chance to dig out all my crazy quilt stuff and get excited about beading again. Most of my supplies were tucked away in an old steamer trunk. It was fun to uncover things I haven't seen in a while. I should do more with crazy quilting.
that I saw posted with quilting bloggers. It showed up on my facebook this week and it looked like fun. I believe they will be having an ornaments swap this fall and I wanted to see what it was like to put one together before I sign up. It was a lot of fun and not too fussy, so I'll probably sign on. The tutorial by Nadine Ruggles explains it all very nicely. You can go there to see this version where the tiny little quilt squares get sandwiched between a ribbon or you can explore a little more and find out how to string them together with a beaded hanger. They are both very lovely. Below is a link to click on and it will take you to the tutorial by Nadine. http://inchiequilts.com/2009/09/04/inchie-ornaments-the-super-secret-project-revealed/Anyway it gave me a chance to dig out all my crazy quilt stuff and get excited about beading again. Most of my supplies were tucked away in an old steamer trunk. It was fun to uncover things I haven't seen in a while. I should do more with crazy quilting.
Subscribe to:
Posts (Atom)